1. Flatten a piece of sterling silver sheet metal. (To flatten my piece of silver sheet metal, I place it on my steel bench block and with another steel bench block, smack it a few times to make sure it is flat). I use 24 guage sterling sheet, but lately I've been melting my silver scrap and rolling it out in my rolling mill for a thicker bezel setting (I will show you how to do this in an upcoming video). Then sand the surface of the silver sheet. Remember that In order to successfully solder your bezel to your silver sheet, all surfaces need to be clean and smooth and touching.
2. Place your bezel wire on the piece of flattened sterling silver to make sure there are no gaps.
3. Lift up your bezel wire and brush flux on the surface of silver sheet and the bottom edge of your bezel. Lay the bezel down on the silver sheet, positioning it how you would like it to end up.
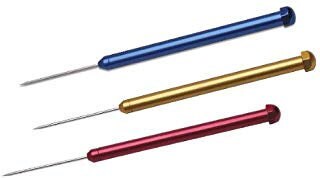
4. Cut MEDIUM solder into 1-2m pieces and using your tweezers, place the solder pieces around the inside of your bezel. Remember not to get too crazy about placement, because when the flux heats up, things will move and you'll need to reposition them with your soldering pick.

https://www.riogrande.com/product/titanium-soldering-pick-set-3/503019
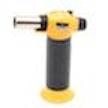
5. For this piece of metal (because it is thicker), I will use my bigger Wall Lenk Torch. I bought mine at Home Depot and it's lasted me forever.

https://www.homedepot.com/p/Wall-Lenk-High-Output-Professional-Torch-LPT-500/203456973?
Turn your torch on and direct the flame around the silver onto the soldering block with little dabs onto your silver surface. Remember not to apply the flame directly to the metal for too long because you don't want to ruin the solder line in your bezel and have to start all over (BEEN THERE....DONE THAT!!!). This is why we use medium solder for this stage of soldering because it has a lower melt temperature than hard solder.
The flux bubbles up with heating and your solder pieces will move out of place. With your pick, push them back closer to the bezel edge, so that when the solder melts, it will flow under the bezel and create a join. While you're doing this, you will need to keep your torch on and keep the silver hot because flux is sticky.
As your metal heats up, you'll see your flux turn a brownish color and then it will get shiny right before the solder melts. Use your pick to gently tap the bezel down in place and watch the solder flow under your bezel to join the two pieces together.
6. Turn off your torch. Pick up the bezel setting with your cross locking tweezers and hold it up to look for any gaps. Dunk your bezel setting in the quench bowl and place it in your pickle.
7. Once it's clean, take a closer look at the join making sure there are no gaps. If you see a gap, Clean the inside of the bezel, apply flux and a few pieces of medium solder and heat your metal again using the same steps as before.
8. Quench and pickle. Dry your piece and clean it up with your flexshaft and sanding blocks.
Stay tuned for upcoming videos about making rings and soldering bezel settings to a ring.
